With October just around the corner and my addiction to Starbucks Pumpkin Scones and Pumpkin Spice Lattés no secret, I'm just giddy about fall and clearly have pumpkins on the brain! In between the fall baking I've been doing, I still need to get my fix of Pumpkin Spice and these are a lovely (100% fat free) treat that seem to last a little longer...
This is a simple sewing project and not only is it a wonderful way to use up some of your scrap fabric stash, but you get to 'spice' up your decor with warm fall colors while making your home smell like Autumn! These lovely little handmade pumpkins make great Halloween decorations or Thanksgiving centerpieces, and would be perfect as a hostess gift if you're enjoying your Thanksgiving feast as a guest.
My fiancé actually suggested these would be great decorations for our fall wedding (next October, omg that's so soon!!) and I would just like to point out that this is one of the many reasons he is perfect for me... since I had already been thinking the exact same thing as I was making them :)
TOOLS & SUPPLIES:
• Scraps of fabric, various sizes
• Marker
• Misc. round traceable objects (see instrux below)
• Fabric scissors
• Needle & sturdy thread (to coordinate w/ fabric)
• Uncooked rice, beans, or other filler material
• Pumpkin Pie Spice (or whole or ground cloves, ground nutmeg, allspice, etc.)
• Funnel (optional)
• Hot glue gun & glue sticks
• Sticks and branches
INSTRUCTIONS:
Start by laying your fabric pattern side down and tracing around the object of your choice with a marker. For the tiny pumpkins, I traced around a spool of ribbon to create a 4.5" circle, and made one a little larger (5.5") by just tracing freehand around it about 1/2" from the actual edge.
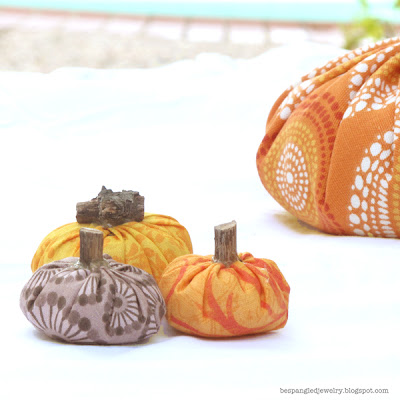
You can literally use almost any size circle you want, but to give you an idea of what mine yielded, the finished size of the baby ones are 2.5" and 3.5" across and I think they are the cutest most perfect lil' things :)
One of the larger pumpkins was made from a circle about 10" across (from tracing around a dinner plate) and the biggest one was 16" across (from tracing around a pizza stone + adding another inch from the edge.) The finished sizes are close to 4.5" and 6.5" respectively.
(I am using my largest circle of fabric in my examples here.)
Use your nice sharp fabric scissors to cut out the circle you traced, then flip it over.

NOTE: I used black thread here to make it stand out in the photos. I really don't recommend using an obvious thread because some of it will likely show when you're finished. Try to choose a color that blends in with your fabric!
Now you have a sweet little pouch to fill with deliciously scented goodies! I used dry rice and experimented with mixing in a few different spices. Pumpkin Pie Spice was my favorite (and quite appropriate, I thought :) You could also try potpourri!
Use a funnel if you have one handy to fill the pouch with your filling and spices as full as you like as long as you can still completely close the top. This large pumpkin held about 2 pounds of rice!
For a large pumpkin, I would suggest using at least 1 tablespoon of spice. For my small pumpkins I used about 1/4 cup of rice and 1.5 to 2 teaspoons of ground spices each. I made one with ground nutmeg and 10 whole cloves which was quite lovely as well!
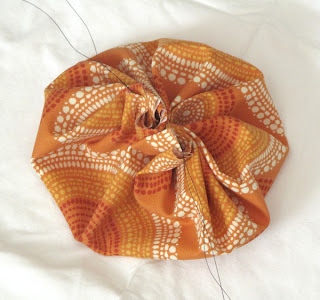
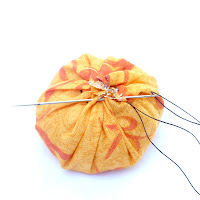
Sew the top of your yummy pumpkin shut by going back around and through all the little folds near the edge with the needle and the remaining thread, pulling tightly. Knot securely and trim the ends of the thread.
Now we're ready to add the stump! You can either cut your branch with pruning shears or break the wood if you prefer a rough end at the top. Try to choose a piece that is large enough in diameter to cover as much of your sewing as possible. Heat up your hot glue gun and apply the glue to the flatter end of the branch you've chosen and press the wood to the fabric in the center of the pumpkin and hold firmly until it sets.
If your glue makes too much mess that you can't clean up, you can always tie a ribbon around the top and make it that much cuter!!
Well, that's all folks! I already made six and I clearly need to make some more because 3 of them found a home with my mom already :) I hope you enjoy making these wonderful autumn spice pumpkins!


My girlfriends and I are doing a craft night tomorrow night and are attempting a version of this -- Love the idea of adding pumpkin spice to them :) Thanks for sharing!! I love pumpkin crafts.
ReplyDeleteSo cool! I'm really happy to hear this. I hope you and the girls have tons of fun making pumpkins!! If you end up sharing them on your blog please feel free to come back and link up the post here; I'd love to see what you come up with!!
DeleteThanks so much for stopping by :)
~Jessica
Hello, I just wanted you to know that I posted your tutorial to my blog: 10 Easy DIYs for Your Fall Wedding http://ow.ly/qwCZG. If you see anything amiss with the use of your image or credit given, please let me know and I will change it asap. I'm making several of these myself and I love the idea of using smaller ones for Fall wedding favors!
ReplyDeleteThanks so much Kristen! I love the post - so many great projects. I'll be sharing on my networks :)
Delete