I'm so excited I couldn't sleep! We are leaving for the airport in an hour, and I am so happy to be going on vacation for the first time in 8 years; the first actual real vacation with the man I love :) We're off to the beautiful Secrets Resort in Punta Cana, in the Dominican Republic, and I have a feeling this is going to be the best trip ever!!!
I can't wait to take some photos of my own :) I'll see you in a week; hasta la huego!
Sunday, June 10, 2012
Tuesday, June 5, 2012
Friday, June 1, 2012
30 Days of Yoga for $30 at Temple Road Yoga in Fort Worth, TX
Special runs through July 21st.
Temple Road Yoga opens today!! Stop by and meet Angel and all the wonderful teachers and see the new space!
I created a line of Yoga Inspired Jewelry for Temple Road after talking with Angel about her vision for her new studio. She used the phrases "thoughtful jewelry," "meaningful pieces," and "spiritual," and I loved the idea and felt so inspired!
Take advantage of this Grand Opening Special and see what I came up with in person, or see them online in my Etsy shop here!
Wednesday, May 30, 2012
Upcycled Wine Corks; Make Your Own Adorable Handcarved Stamps!

This month's Etsy Fort Worth Upcycle THIS! Craft Challenge object is wine corks. I've had these corks sitting on my craft desk for weeks, waiting for inspiration (and, let's be honest, to remind me about the impending deadline).
I had a few ideas, but nothing that really motivated me enough to actually get started on the project...until the other night, when I was working on a painting. I got the feeling that I was almost finished, but not quite; it just needed a little something else, some finishing touches. Then I thought it would be perfect if I could paint some lovely flowers all around the edges...but that seemed like it would take me hours to do. And well, I was feeling lazy.
So, naturally, I tried to think of a crafty little short cut, and the first thing that came to mind was to try and find a flower shaped stamp at a craft store...but since it was already 11pm and I wanted to finish the painting, that wasn't really an option. Glancing over at my desk and seeing the corks, it hit me! Carve a little flower in the end of one of the corks, dip in paint, stamp, repeat, and voilĂ ! The idea was born.
It was super easy! I sketched a rough outline on the end of the cork with a sharpie, and used an X-acto craft knife to cut around the shape. I pressed it into the gold acrylic paint I was using, and used it like a stamp. This cork above was actually made of fake cork, from a bottle of Cupcake chardonnay (yum, and who the heck wouldn't try a wine called Cupcake??) and it worked great!
I loved the idea, and - don't judge me - I had plenty of other wine corks, so I decided to try something a little more complicated, like a word. Now, don't forget, if you want to stamp a word, you have to carve the letters backwards. Yes, I made this mistake the first time. D'oh! :/
This time, I tried real the corks made with real cork, and they worked just as well!
Sadly, upon carving the 'O' I lost the heart inside of it to an unfortunate accident. Luckily, my supply of wine corks had still not been dented in the least by this project, so I was able to carve another little heart on its very own stamp.
I L♥VE the way they turned out! This was such a quick and easy project; I don't think it took more than 20 minutes. I had so much fun, I kept going :)
Here's how you can make some hand-carved stamps of your own using recycled wine corks!
~Choose the end of the cork with the smoothest texture, probably the end that was inside the wine bottle.
~Draw a design using a marker, and remember that it's best not to be too intricate or have too many thin areas, for best results.
~Using an X-acto or craft knife (- be sure that you use a very sharp blade -) cut around the edges of your pattern, using the tip of the blade and pushing straight down into the cork, about 1/4" deep. Instead of using a sawing motion, press the blade down and pull it straight up for each cut, and use lots of little straight cuts like this for curves instead of trying to make one long curved cut.
~Lay the cork on its side and cut around the circumference about 1/8" to 1/4" down from the end you carved, and about 1/4" deep so that all the cuts you made from the top will be cut free. Gently pull off the cut pieces of cork from the top, and go back and refine your design where needed.
~Use paint (I used acrylic) or an inked stamping pad in the color of your choice, and you're ready to get stampin'!
~Don't have a filthy wine-drinkin' cork-savin' habit like me? Take one cork and cut it into three equal pieces, about 1/2 inch each. You can cut about 1/4" inch deep and still have a 1/4" base, and now you have 3 times the number of stamps!!!
Please feel free to link up to your own posts or projects in the comments if you use this technique, and I'd certainly appreciate a link back on your own blog as well if you are inspired by this post ♥
I LOVE to be pinned on Pinterest :) I hope you'll share with the world by pinning me if you like what you see here!
Sunday, March 25, 2012
I'm SoCrafty! Upcycled Sushi Tray Earrings (DIY or BUY!)
Upcycled Sushi Tray Earrings: DIY or BUY
Recently I was accepted as a regular contributor to Squidoo's brand new SoCrafty Magazine. I submitted my Sushi Bracelet Tutorial hoping to be included once, and they loved it so much they asked if I would write a monthly craft-related post for their blog! I am so excited about it; I can't believe I forgot to mention it!
My first contribution was a tutorial for earrings made from upcycled plastic sushi containers just like the bracelet. If you want to try your hand at making a pair for yourself, this link will lead you to the entire step-by-step tutorial (with photos).
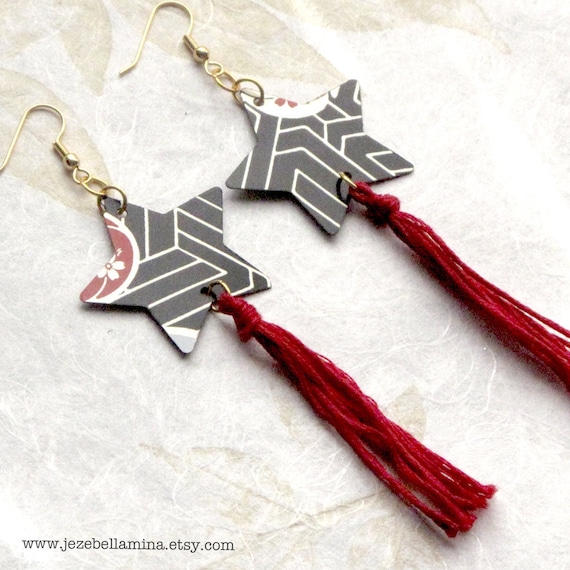
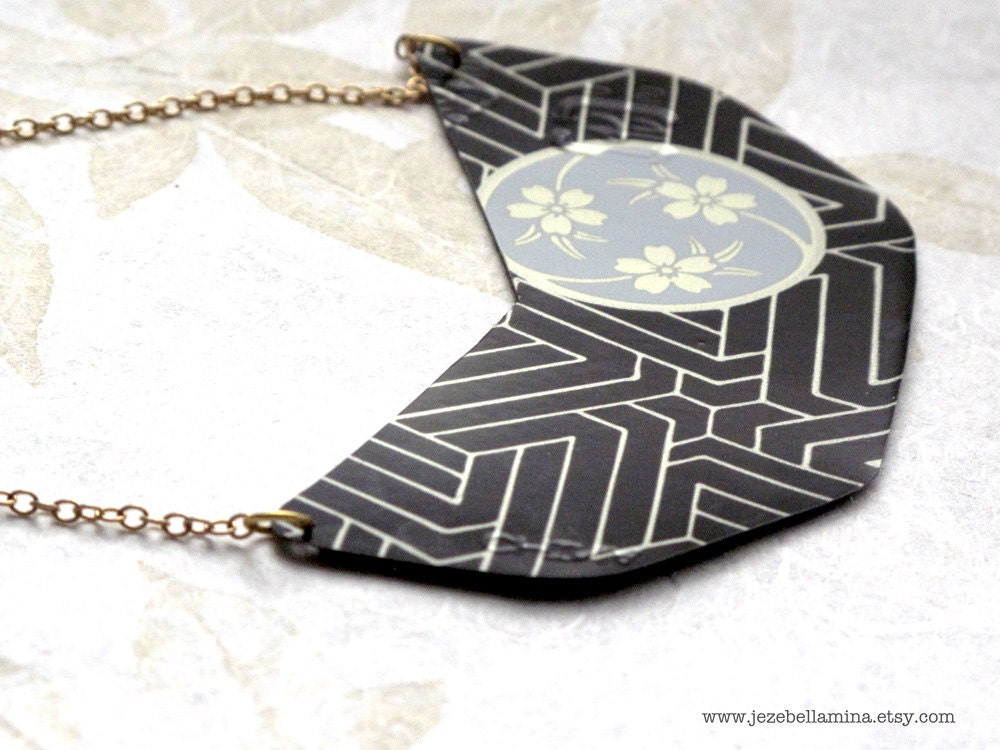
I think they're pretty cool! I actually listed them for sale in my other Etsy shop, Jezebellamina, along with these super fun long star tassel earrings and large plate necklace.
Recently I was accepted as a regular contributor to Squidoo's brand new SoCrafty Magazine. I submitted my Sushi Bracelet Tutorial hoping to be included once, and they loved it so much they asked if I would write a monthly craft-related post for their blog! I am so excited about it; I can't believe I forgot to mention it!
My first contribution was a tutorial for earrings made from upcycled plastic sushi containers just like the bracelet. If you want to try your hand at making a pair for yourself, this link will lead you to the entire step-by-step tutorial (with photos).
I think they're pretty cool! I actually listed them for sale in my other Etsy shop, Jezebellamina, along with these super fun long star tassel earrings and large plate necklace.
Other Related Links:
Visit my profile page at SoCrafty, where I share lots of other fun upcycled craft tutorials and ideas.
More Cool Upcycled Jewelry for sale in my Jezebellamina Etsy shop.
![]() |
| Star Tassel upcycled earrings by Jezebellamina on Etsy |
![]() |
| Large Plate necklace by Jezebellamina on Etsy |
Wednesday, March 7, 2012
My New Handmade Packaging!
After spending entirely too many hours online shopping for the perfect packaging for my jewelry, I gave up and decided to make my own. If you haven't noticed already, I'm a huge fan of anything DIY, and especially when it solves so many problems with such a simple solution.
✧ I needed something that wouldn't add bulk or weight to affect my shipping prices, or the size of the envelopes I ship my orders in.
✧ I needed something that wouldn't add too much cost to my product. I didn't want to raise prices to accommodate for packaging that isn't optional, but at the same time I wanted to reinforce my branding and make every purchase feel like a special gift!
✧ I didn't want to have to buy in huge quantities to get the lowest prices because not only is it a huge chunk of change up front, but I don't have a lot of space left to store any more boxes of stuff! (You betta belieeeeve I already have a whole room in the house dedicated to jewelry and arts & crafts supplies!)
✧ I wanted a "one size fits all" box of some kind, which of course doesn't really exist...unless you can make one any size you need at the drop of a hat!
✧ I wanted something that didn't add to the inventory I have to keep track of, as far as re-ordering and trying to guess how many I need without overbuying.
These handmade pillow boxes are the perfect fix for all these things, and I L ♥ V E the way they turned out!
Monday, March 5, 2012
Monday Musings: Peace of Mind

"Promise Yourself to be so strong that nothing can disturb your peace of mind."
This line is an excerpt from a poem called "Promises to Yourself" (also known as The Optimist's Creed) by Christian D. Larson.
This week, I am focusing on this mantra. I know it is easy to let outside factors and things outside of our control worry us and cause negative thinking, but ultimately we are the masters of our own minds and should practice a positive outlook even at the worst of times. While we cannot control the things that may happen around us, we can control the way we react to them and how we let them shape our lives.
Things never go exactly as planned, but with presence of mind and clear focus, we can adjust our sails accordingly to stay on course when the winds change directions. And as captains of our own ships, it is our duty to weather these storms with strength and determination, and no matter how rough the seas, keep steering toward the destination we seek.
Subscribe to:
Posts (Atom)