TOOLS & SUPPLIES:
• 2 colors nail polish (I used Alpine Snow and OPI Red )
• clear top coat nail polish
• Star paper punch (1/4" size)
• sticky labels
• scissors
• toothpick (optional)
• tweezers (optional)
 |
First paint your nails as you normally would with two coats of the color you want to use as your base. (I used OPI Red). Let this dry completely. Overnight is best, but at least let the polish cure for several hours so you don't mar the surface.
For the Stars, use the star punch to punch out as many as you think you may want to use from your sticky sheet label. We are going to use the negative shapes as a stencil.
The label sheet I am using is actually the scrap from when I print my shipping labels...you know I don't like to waste things!
Use the scissors to cut tabs around the stars, long enough so they will overhang the end of your nail for easy removal after painting.
Remove the back from the label and place the tab where you want to create your star shape on the nail. I liked mine off-center. Be sure that the label is stuck firmly to your fingernail, especially around the points of the star. Use the toothpick to press it down all around the edges of the star if you need to.
Please note: this is the order in which I did things, but I would actually recommend doing all the cutting and placing of labels on all your nails before you paint your second color. I ruined a couple of my stars while messing with scissors, etc. and had to start over!
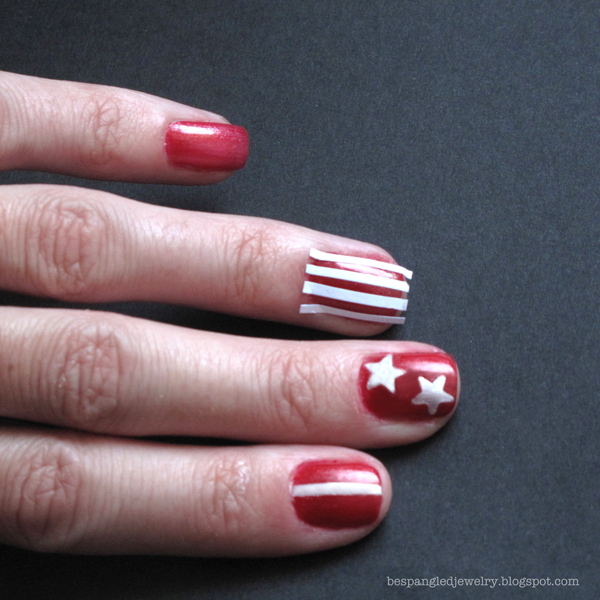
 Use your accent color to paint inside the star shape, two coats (the color I used is OPI Alpine Snow). Peel off the label while the polish is still wet. If you need to, you can use the toothpick to straighten any crooked points on the star. Mine needed a little help, but not bad for a first try!
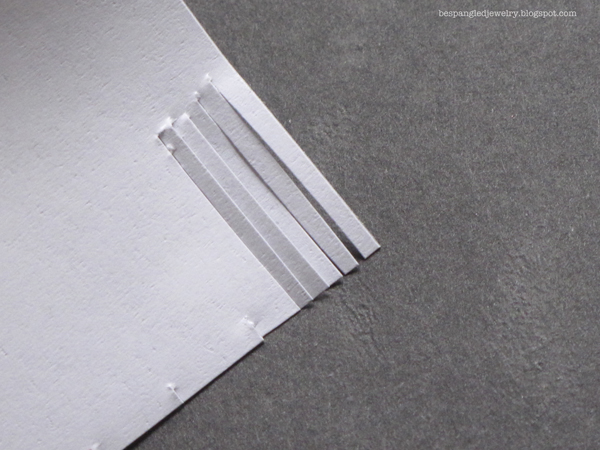
For the stripes, cut thin strips in the label as even as possible. Make them long enough to overlap your cuticle and hang off the end of your nail.
I started with one stripe on my pointer finger, mainly because I wanted to test the technique and see how it looked. I thought I would add more afterwards, but it doesn't really make sense to paint one stripe at a time... and anyway, I liked it with just one, so I kept it!
If you want 3 stripes on one nail, you will need 4 strips since we're using the space between them for our accent color.
Peel the back off the label and place the strips on your fingernail, as straight as possible and spaced according to the thickness of stripes you want.
Paint between the lines using your accent color, two coats, and peel the strips off while the polish is still wet. Tweezers come in helpful here for peeling off very thin strips without smudging the fresh paint.
Again, use the toothpick to clean up any edges - it can remove paint that goes outside the lines, or dip in polish and use a tiny bit to fill in any spots missed inside the lines.
Allow to dry, then finish with one to two coats of clear top coat nail polish.

That's it! I hope you had fun reading this and got some ideas for your own nail art DIY manicures, whether it's for the Fourth of July or not! The possibilities are endless, why not see what you can dream up?
Feeling inspired by Independence Day? Try these Ten Fabulous Fun 4th of July craft tutorials too!
I linked up at:


New follower from Diana's Rambles. I love pretty nails, pinned!!!
ReplyDeleteWanda Ann @ Memories by the Mile