Are you ready for another fun tutorial? Let me show you how I made these cute "Honeydew List" or grocery list holder fridge magnets from popsicle sticks and baby clothespins!
This month's Etsy Fort Worth Upcycle THIS! Craft Challenge 'secret ingredient' is clothespins. I have to admit, I didn't recycle the clothespins because I don't really use them, but I did happen to already have a bag of adorable mini clothespins that I bought ages ago at the dollar store. However, the popsicle sticks have been recylcled for this project (I've been having a little too much fun making alcoholic popsicles lately...)
This tutorial is a pretty easy project and the result is great! These would also make cute name plates or photo holders... at any rate, I hope you have fun with this one.
TOOLS & SUPPLIES:
click links to see prices at Amazon
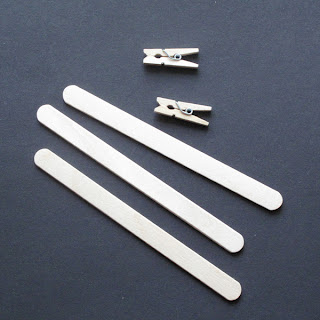
• popsicle sticks (aka craft sticks) - 3 for each magnet
• mini clothespins (1") - 2 for each magnet
• craft knife
• scissors
• fine grit sandpaper
• acrylic paint
• paintbrushes
• craft glue (E-6000)
• craft magnet strips (1/2" wide)
• white cardstock
• glitter glue (optional)
INSTRUCTIONS:
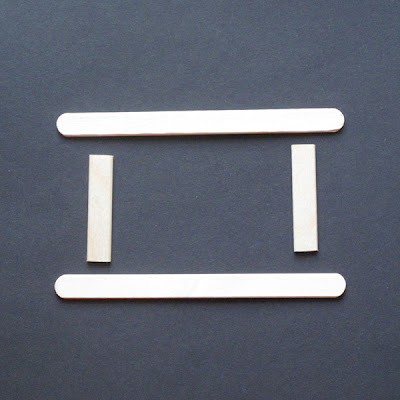
 Let's start by cutting one of the craft sticks in half. Use a ruler to measure and mark the halfway point, then cut with a sharp craft knife. If you score the wood well on both sides, the stick will then snap in half easily and save you some work.
Cut off the rounded ends in the same manner, making sure both pieces will be the same length. I made mine 1.75" long
Use the knife (or a piece of sandpaper) to clean up any splintered ends. If your other two craft sticks have any rough areas, smooth them with sandpaper as well.
Now we're ready to start painting! Choose any number of colors that you like. I'm going to show you how I used three different colors on mine.
First, I decided on a nice bright midtone and made that my 'main' color. It's a gorgeous teal or peacock blue color. (The paint is a Pantone inspired "Dynasty Green" Artist's Acrylic). I painted the clothespins on all sides but one of the thin edges, and the front and sides of the craft sticks as shown below.
After my first color dried completely, I painted a coordinating dark tone (Phthalo Green). After that dried I painted a small section of a lighter color that I made by mixing the first color with a touch of white.
When the paint has completely dried, use dots of E-6000 on the ends of the two short sticks and glue the longer ones on top, ends hanging over a bit. Press the pieces together and leave the glue to cure for a few minutes before moving.
While the glue is setting, place your sheet of cardstock in your printer and print a word that you want to use in a font that you like. I used Photoshop but you can use any word processor or image software that you have available. My font size is about 38 and the word measures about 2.25" long, which leaves plenty of space around the edges.
My frame measures 3" by a little under 1", so I cut the paper 3.5" x 1.25" to overlap the back of the frame enough for gluing. I laid the frame over the paper to ensure proper placement, and used a pencil to mark the outside edges of the frame. I cut inside of those lines about 1/8th inch and it was perfect and easy.
I used E-6000 on the short ends of the back of the frame and glued the cardstock down.
I used scissors to cut the magnet strip in half lengthwise, and about 3.25" long. The magnets I had actually have adhesive on them, but didn't seem to want to stick so I used the E6000 on those too. (Incidentally this glue is becoming one of my top craft necessities, along with Mod Podge and toothpicks :)
These baby clothespins make excellent clamps, in a pinch! The magnet strips kept trying to roll back up, probably since it was cut from a roll not a flat sheet. These little guys did the trick! I left them on for about 15 minutes before proceeding to the last step.
Finishing touches: Use a dot of E6000 on the back of the tiny clothespins, right in the middle and press them to the frame with the clamping ends down. I lined them up with the short edges of the frame.
If you like, grab your glitter glue and add a couple of stripes or dots. I think it made a nice accent for my girly pink grocery list holder!

What now? That's it! Now make another one!!


No comments:
Post a Comment